GodotSteamKit Tutorials - Lobbies
This tutorial will cover the basics of using the Steam Lobbies custom scene from the GodotSteamKit.
Usage
Once you have the GodotSteamKit installed, you will notice the lobbies starter kit actually has quite a few custom scenes to use. All of these scenes should work out of the box; however, depending on how you implement them, you may need to hook them together so your game properly transitions from one to the other. There is an lobby_manager.tscn which is an optional scene to facilitate such transitions.
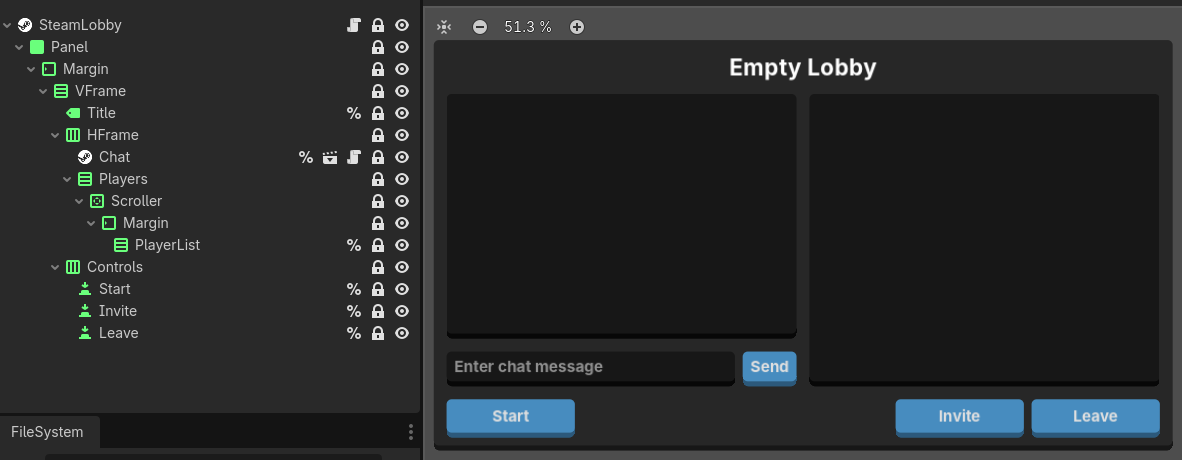
lobby.tscn
This is the main lobby scene that is shown when you have successfully joined a lobby as either a client or host. It includes the Steam Chat custom scene to provide a chat interface as well as a player list and some basic buttons for starting a match, leaving the lobby, or inviting friends.
Steam Global Script Usage
This scene currently relies on a global script / autoload script to store the lobby_id so that ID can be used elsewhere. It is recommended you create and include a script called Steamworks that has at least var lobby_id: int = 0 as its contents.
The Kit comes with a created steamworks.gd file in the autoloads folder for this purpose but you can use whatever script you want. You will just need to find and replace any mention of Steamworks.lobby_id in the custom nodes.
The "Empty Lobby" title is replaced by the host's username affixed with "lobby" at the end such as "Gramps's Lobby". This behavior can be changed in the _get_lobby_name() function on Line 49.
The invite button will trigger the activateGameOverlayInviteDialog() function and requires the game overlay to be enabled. This may not appear if you run the project from the editor but should work fine when run from the Steam client.
Another point of possible modification would be the leave button as this currently only leaves the Steam lobby, sets the lobby_id to 0, and emits the close_panel signal to trigger transitioning.
Obviously, you can also add more buttons and options to the controls HBoxContainer if you would like to include more functionality not already available.
lobby_player.tscn
This is used exclusively by the lobby.tscn above. It displays a player in the lobby and has some extra buttons for interacting with this player. Each one is instantiated when users leave or join the lobby.

This scene uses the Steam Avatar and Steam Username custom nodes to track and update the player's data. There is also the options button, using the little gear icon (all the icons are from Kenney's assets), that opens a options list of four additional buttons to interact with the player more:
- Profile - opens the player's Steam profile in overlay.
- Achievements - opens the player's achievements page for this game in overlay.
- Promote - promotes this player to lobby host; only visible and active if the local player is the host.
- Kick - kicks the player from the lobby; only visible and active if the local player is the host.
To expand more on the promote button, in the lobby_player.gd script attached to this node, you may want to add more to the _on_promote_pressed() function depending on the networking your game is using or other features you have implemented. Currently all this does is just set this player to the host and refresh the controls.
lobby_host.tscn
Next we will check out the lobby hosting scene. Much like the other scenes it is fully functional.
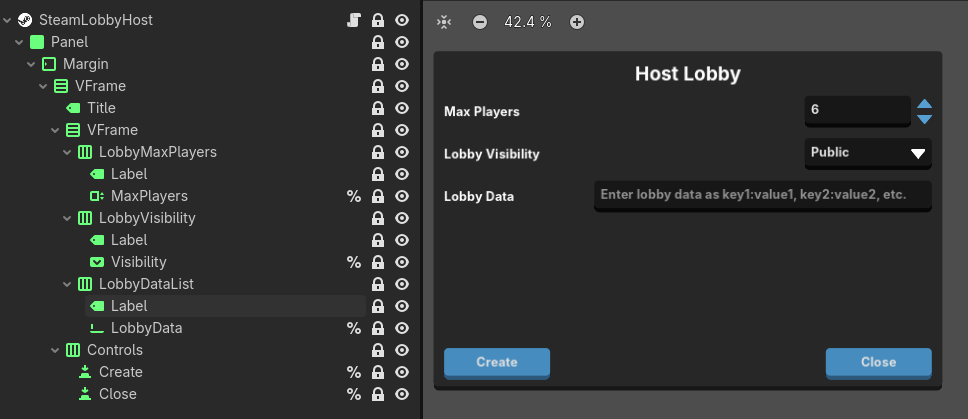
Currently the host scene has only three main components: max players, lobby visibility, and lobby data. The first two are pretty self-explanatory though you can read more about lobby visiblity here.
The lobby data is actually a comma-separated series of optional key-value pairs used to set lobby data that can be filtered, searched, or used in other ways. If they are not entered as key:value then the function will ignore them when you create the lobby. This behavior can be altered in the _on_lobby_created function on starting on line 50.
lobby_join.tscn
The next on our list is the lobby joining scene or lobby list scene. There may not be a whole lot here to alter other than the theme.
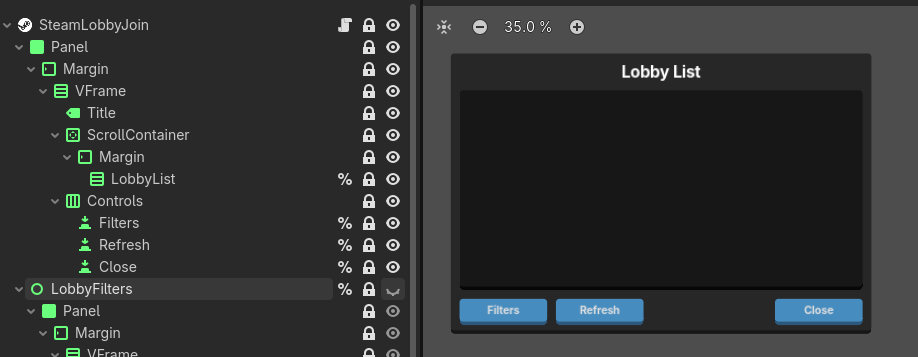
The refresh button is pretty self-explanatory. Though, before that gets pressed, users can press the filters button to set a variety of filters to refine their search.
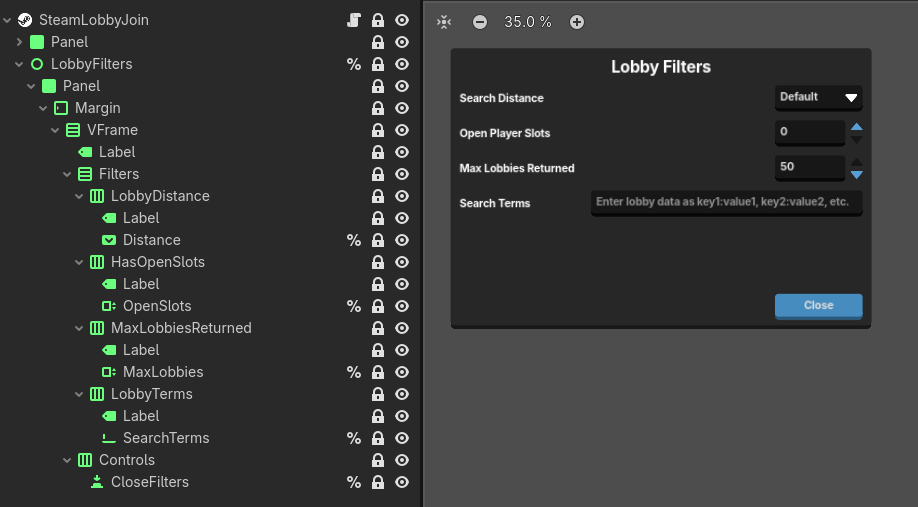
Most of the options here should be pretty clear as to what they are, like open player slots and max lobbies returned. For more information on search distances, you can check out distance explanations here. The search terms field works much like the lobby data counterpart in hosting where they are comma-separated key-value pairs. This field will search for the terms set there.
lobby_entry.tscn
These little scenes are another companion to the lobby join scene and only display an available lobby with the lobby ID stored.

There are many other pieces of information you could add to this scene such as the total number of current players, map names, server icons, etc.
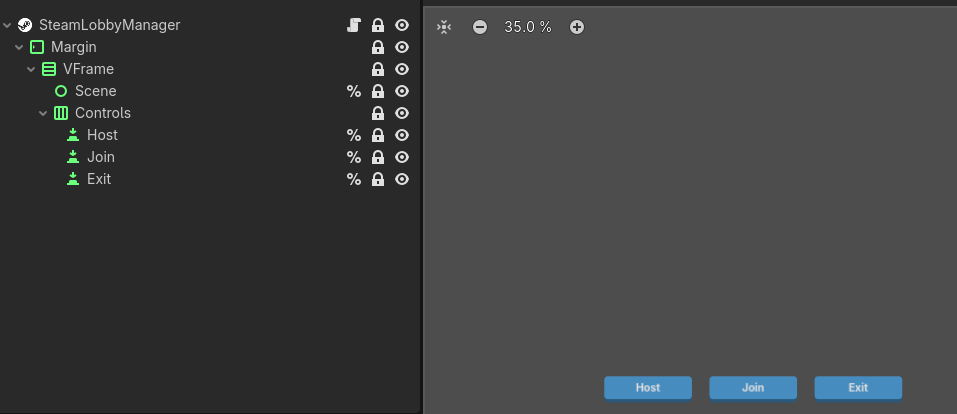
lobby_manager.tscn
Lastly, the optional lobby manager scene which mostly just swaps between our three major lobby scenes: lobby.tscn, lobby_host.tscn, and lobby_join.tscn.
The scene also handles command line arguments passed by the Steam client, primarily the lobby invite connection strings. This is better used when your game boots up but it is here as an example.
Signals
All of the lobby custom scenes contain the same signal.
close_panel
This is called when a scene is closed and used to facilitate transitioning from one lobby scene to another; such as from hosting to actually being in the lobby.